I both applied it using an old deodorant container and also by putting it in a small container and apply with my fingers. I am very excited! I have struggled with anything natural working for me, so I was a bit skeptical. I have tried many, many different kinds over the years and wanted so badly to get away from anything with Aluminum in it (which all Antiperspirants have in them), but just couldn't stand how I would stink! I do have some wetness sometimes, but NO ODOR with it! I followed the directions exactly, and I'm happy to report that it was a success. It does make a lot, so feel free to half the recipe as best you can. You can play around with the Soda/Corn starch amounts to see what fits your body best. I tend to add one more tablespoon of Soda than Corn starch. For more sensitive skin, use Arrowroot Powder in place of Corn Starch, and use less Soda.
Here is the link...
http://survivingthestores.com/homemade-coconut-oil-deodorant.html
So if you ever experience mild irritation, try some of these suggestions.
http://www.mothering.com/community/t/1248042/irritation-from-homemade-deodorant
**If you have especially sensitive skin, increase the amount of cornstarch to 6T and decrease the baking soda to 2T.
Sunday, January 29, 2012
Thursday, January 26, 2012
The Amazing KEFIR
I no longer make milk kefir, but always have water kefir or grape juice kefir ready to drink. I have to say that Grape Juice Kefir (1/4c grains with 1qt Grape Juice left out for 24-48hrs and fermented for a week or 2 in the fridge) is my absolute favorite and I drink it everyday! But the grains don't last more than a few times before they die, so I always keep a supply of grains ready to go. When you have extra grains, you can add them to smoothies, eat them, share or sell them, dehydrate them or try some of the other kefir recipe flavors that are very yummy!
WATER KEFIR
-1/3C sugar (organic cane or raw is best, though Sucanat is highly recommended, but has a strong flavor)
-1Qt jar of hard water (dissolve sugar in about half of it before you add the grains and rest of the water)
-1/4C water Kefir grains
-Cover with a coffee filter or paper towel for 2-5 days (I usually do 3 at the most) and leave on the counter
-Strain out the grains with fine mesh strainer and put the kefir (liquid) in an air tight jar in the fridge
-Then repeat with your new grains
IMPORTANT: Kefir grains need minerals to continually produce, so if you use cane/raw sugar, after 3 or so batches, make a batch using Sucanat to really feed the grains well. You can either drink the kefir or dump it if it's too strong a flavor for you.
Letting the strained Kefir sit covered air tight in the fridge for a couple more days usually makes it more carbonated!
***NOTE*** Reverse Osmosis water will kill your grains!! I found the following online, and was confirmed by my sister, who used RO water and her grains died!
"Reverse osmosis water has in most of
our observations led to eventual kefir grain death even. It just
doesn't contain enough of the various and vital minerals found in normal tap, spring or mineral
water. It is what we like to call 'processed' or 'refined' water, basically an empty water devoid of its
normal nutrients and properties, much like white sugar is compared to whole cane sugar. It's an
unbalanced and empty nutrient."
Here are some links that you can check out what this is all about.
http://www.yourkefirsource.com/water-kefir/water-kefir
http://www.kefirlady.com
http://users.sa.chariot.net.au/~dna/kefirpage.html
http://www.waterkefirgrains.com/
http://www.yourkefirsource.com/water-kefir/water-kefir
http://www.kefirlady.com
http://users.sa.chariot.net.au/~dna/kefirpage.html
http://www.waterkefirgrains.com/
RESTING/STORING KEFIR GRAINS
Now storing Kefir over a longer period of time is not so easy… Kefir
(either milk of water) can be very demanding, even stored in a fridge you will not get very long
before your grains die. The method of storage that you use will entirely
depend upon how long you are likely to be away.
The first method is for leaving for up to 7 days:
- Place the grains (water or Milk) in a glass jar with the usual amount of liquid that you would ferment.
- Store the jar (sealed) in the fridge for up to 7 days
- Strain the kefir (the drink produced is drinkable)
Basically this method puts the grains into a semi-dormant state and
slows down the metabalism of the organism. HOWEVER, when you return to
brewing as normal at room temperature you will find that the first few
brews will take approximately 24 hours longer as it takes the grains a
few days to wake/warm up again.
If you are going away for more than 7 days but have someone who can
“babysit” your kefir (while water the plants or feeding the cats) then
follow the directions for above but after straining the grains and
restarting the batch pop the glass jar back in the fridge and leave for a
further 7 days. This method can be used for up to 2/3 months HOWEVER…
resting kefir grains for this long will have a negative affect on the
grains and the microflora in them. THERE IS A CHANCE THAT YOUR GRAINS
MAY BECOME DAMAGED BEYOND REPAIR so it is best to have a back up set of
grains in the freezer (just in case!). When you return to room
temperature brewing again it will take your grains quite some time to
get themselves back to optimum brewing (up to 10 brews) and as above the
brews that you perform during this time will take longer to
complete.The longer the grains were kept dormant the longer it will take
for them to recover I personally wouldn’t recommend storing grains with
this method this long and think that if you need to rest your grains
for longer than say 5 or 6 weeks the freezing method works best.
If you do not have someone who can look after your grains then you
can rest them for by increasing the volume of liquid by about 30% for
every week that your grains are being left however this method is really
only any good if you are leaving your grains for 2 weeks (ie your
summer holiday) and not much longer than that. Also this method works
best with milk kefir, water kefir can be a bit more choosy and therefore
it can be a bit hit and miss.
Please be aware that the same applies with regards to resuming your brew at room temperature no matter which method you use.
Tuesday, January 24, 2012
SIMPLIFY your recipes
Was just thinking yesterday about how SIMPLY we eat at the Garner household. Recipes usually consist of a few basic ingredients. Whether its chicken in the crockpot with italian dressing, or baked pork chops or fish, it's usually super simple to prepare. I don't use many food items that can't be found at Aldi, so it's often very traditional fixings. Nothing fancy schmancy around here. Almost every meal is accompanied by a salad or veggie tray, a warmed up frozen veggie, possibly rice or homemade mashed potatoes, and rolls or bread. I believe I save money by shopping at Aldi and sticking to a handful of favorite recipes, and always having the ingredients on hand. That way I don't have a bunch of ingredients laying around that I only use once in a while for that ONE certain recipe. Everything I have is very versatile, good with red meat or white. We train our palatte for variety, so the trick is to train it for routine. Most countries eat Rice and Beans EVERYDAY!! And many of us complain if we have to have the leftovers again the next day. We have gotten spoiled in America, to say the least. Anyways, just my thoughts:)
Monday, January 23, 2012
Rationing Chocolate Chip Cookies
I love homemade CCC, but sure don't need to eat a whole batch of them!! So, I make a certain number of cookies, then freeze the drop the dough by teaspoon fulls onto a baking sheet and freeze them. After they are frozen, scrape the dough off the sheet and dump the dough balls into a freezer container and take out portions as you need them:)
Cooking Dried beans instead of buying Canned ones
Below is the recipe I followed to make a batch of dried beans, which I put into the freezer. They turned out perfectly!!
http://www.ehow.com/how_2306803_cook-dried-beans-crock-pot.html
http://www.ehow.com/how_2306803_cook-dried-beans-crock-pot.html
Healthy Bread in 5 Minutes a Day
So my wonderful sister in law mentioned this concept quite a while ago to me, so I bought the cook book....and like too many other cook books I've purchased, it sat in my cupboard. Well, with the growing desire to make my own things, I pulled that book out. I was inspired! Making my own bread had always intimidated me (I think it was the yeast/rising thing!), but NO MORE!! In the last 3 days, I have baked 2 Free form Artisan loaves and one in a loaf pan. I have another batch of dough ready to be prepped to bake into Soft Honey Wheat Sandwich bread. Sounds delish, huh? So here is what I did.
5 1/2 cups whole wheat flour
2 cups unbleached all-purpose flour
1 1/2 tablespoons granulated yeast (can decrease)
1 tablespoon Kosher salt (can adjust to taste or health concerns)
1/4 cup (4 tablespoons) vital wheat gluten (or vital wheat gluten flour)
4 cups lukewarm water (about 100 degrees F)
1 to 2 tablespoons of whole seed mixture for sprinkling on top crust: sesame, flaxseed, caraway, raw sunflower, poppy, and or anise
First, measure the dry ingredients into a 5-quart bucket or bowl, and whisk them together (you can also use a fork, or if it’s lidded, just shake them well). Mixing the dry ingredients first prevents the vital wheat gluten from forming clumps once liquids are added.
Now add the water to form a very wet dough. Don’t add additional flour to dry this out:
Cover loosely (leave lid open a crack) and allow to rise for two hours at room temperature (if you decreased the yeast, you’ll need more time). NEVER PUNCH DOWN or intentionally deflate. The dough will rise and then begin to collapse. Refrigerate and use over the next 14 days, tearing off one-pound loaves as you need them.
On baking day, cut off a grapefruit-sized piece of dough (about a pound), using a serrated knife or a kitchen shears.
Now, quickly shape a loaf as you’ve seen in our video on the website, or on our new Amazon site (but note that the Amazon video leaves out the crucial 90 minute resting time that I’ll talk about in a minute). Should take less than a minute— still pictures don’t do it justice, but basically, you pull the top around to the bottom, rotating quarter-turns as you go. DON’T KNEAD or otherwise knock all the gas out of the loaf:
Cover the loaf loosely with plastic wrap and let it rest on a pizza peel covered with cornmeal or parchment for 90 minutes (40 minutes if you’re using fresh, unrefrigerated dough. This is longer than our 1st book because whole grains take a longer rest than white doughs. Depending on the age of the dough, you may not see much rise; our loaves depend more on “oven spring.”
Thirty minutes before baking, preheat the oven to 450 degrees F (230 degrees C), with a baking stone placed on a middle rack. Place an empty broiler tray for holding water on any other rack that won’t interfere with rising bread.
Just before baking, use a pastry brush to paint the top with water (we’ve dropped the cornstarch wash) and sprinkle with seed mixture. Slash the loaf with 1/4-inch deep parallel cuts across the top (or a singe lengthwise cut as in the first picture). Use a serrated bread knife held perpendicularly to the loaf.
Slide onto hot stone and carefully pour 1 cup of hot tap water into the broiler tray (in the book, we give alternatives for creating that steam environment, which is essential for creating a great crust).
After a 30-minute bake, cool on a cooling rack, and serve however you’d like. You have the basis for a complete, nutritious meal, bursting with healthy vegetable oils (from wheat germ), fiber (from wheat bran), and vitamins. We look forward to hearing more from you as people have questions about the book.
http://www.artisanbreadinfive.com/2009/10/26/our-new-book-healthy-bread-in-five-minutes-a-day-is-released-tomorrow-get-yourself-some-vital-wheat-gluten-and-make-our-whole-grain-master-recipe
The bread turned out great! There is also a White Bread version for those who don't want to do the Whole Wheat (but WW is sooooo much healthier for you!!).
3 cups lukewarm water
1 1/2 tablespoons granulated yeast
1 1/2 tablespoons kosher or other coarse salt
6 1/2 cups unbleached all-purpose flour
Cornmeal for the pizza peel
And then, you know the drill. Mix with a spoon in a food-safe bucket, let it rise at room temperature for 2 to 5 hours, then into the fridge for two weeks. Tear off chunks, shape, rest, and bake as needed. Details in the book
The book also has Gluten Free breads to make using this super easy process.
So using the WW recipe, it works out to about 40 cents per one pound loaf. The White version would be even less than that!! Give it a whirl and tell me what you think:)
Thursday, January 19, 2012
Melissa's Shepherd's Pie...it's what's for dinner!
So this is a family staple...Shepherd's Pie. There are many different ways to make it but this is how I've made it for years (a mix of my mom's recipe and my additions).
1. 1# hamburger, browned (with onion flakes-opt.) and drained
2. 1 can cream of mushroom soup
3. Mix these together in a 2qt baking dish
4. Layer 1/2 bag frozen corn and 1/2 bag of frozen green beans or use a bag of mixed veggies if you like
5. Spread on top of that 4-6 servings of homemade mashed potatoes, which is about 2# of potatoes
6. Cover the top with Shredded Cheddar
7. Bake 375* for 35-40 minutes, or till cooked through
Serve with buttered bread and applesauce!
DISHWASHER DETERGENT and JET-DRY alternative
So using the Borax that you've purchased to make your own laundry soap, now you can make your own Dishwasher soap! This one from http://www.diynatural.com/simple-effective-jabs-homemade-dishwasher-detergent-rinse-agent/ works okay, but I think I have discovered a more simple recipe that works even better!!
DISHWASHER DETERGENT
JET DRY ALTERNATIVE
Just add WHITE VINEGAR in your Jet Dry dispenser and you are good to go!! No more harmful chemicals in your dishwasher!
DISHWASHER DETERGENT
- 1 cup Borax
- 1 cup Washing soda or Baking soda
- Citric Acid, kept separate (locally can be purchased at Maple City Market, E&S)
JET DRY ALTERNATIVE
Just add WHITE VINEGAR in your Jet Dry dispenser and you are good to go!! No more harmful chemicals in your dishwasher!
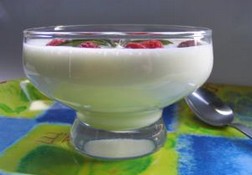
YOGURT
Yogurt Recipe
1 gallon milk (whole is the best!)
1/2 C powdered milk (Optional-acts as a thickening agent)
1 cup plain yogurt
1. Heat to 180 degrees on stove (use a candy thermometer), stirring regularly so it doesn't scorch and hold for several minutes at this temp.
2. Cool in sink w/ ice water to 130 degrees.
3. Add ...1 cup plain yogurt w/ live cultures (for your next batch save a cup of your own! It can be used 4 times before you need to buy fresh yogurt from the store again) and mix well using a whisk. **If you are only going to use this as vanilla yogurt, feel free to add the vanilla and some sweetener to the whole batch now**
4. Pour into quart jars or whatever containers you have.
5. Fill two gallon milk jugs with HOT water and put in a cooler. This makes your incubator.
6. Place your containers in with the hot water jugs and lay at towel over them. Close cooler and incubate for 6 hours (or longer for more tart yogurt).
7. When ready to serve, add sugar, vanilla and fresh /frozen fruit. I added maple syrup and that was awesome! It keeps for a long time in the fridge. It takes about 20-30 minutes total to get it all ready and in the cooler.
We make smoothies with this almost everyday.
Quick and Easy recipes
3/4c yogurt
1tsp vanilla
1/2 orange or grape juice (V8 splash mixes are awesome with this, too)
some crushed ice
Blend well and enjoy!
HOMEMADE LAUNDRY SOAP and FABRIC SOFTENER
LIQUID
4 Cups - hot tap water
1 Fels-Naptha soap bar
1 Cup - Arm & Hammer Super Washing Soda*
½ Cup Borax
- Grate bar of soap and add to saucepan with water. Stir continually over medium-low heat until soap dissolves and is melted.
-Fill a 5 gallon bucket half full of hot tap water. Add melted soap, washing soda and Borax. Stir well until all powder is dissolved. Fill bucket to top with more hot water. Stir, cover and let sit overnight to thicken.
-Stir the whole thing with a whisk (breaks it up the best) and fill a container half full with soap and then fill rest of way with water. Shake before each use. (will gel) note--I have used Sterilite brand pitchers but Rubbermaid 2qt Mix and Stir pitchers work the best!!
-Optional: You can add 10-15 drops of essential oil per 2 gallons. Add once soap has cooled. Ideas: lavender, rosemary, tea tree oil.
-Yield: Liquid soap recipe makes 10 gallons.
-Top Load Machine- 5/8 Cup per load (Approx. 180 loads)
-Front Load Machines- ¼ Cup per load (Approx. 640 loads)
*Arm & Hammer "Super Washing Soda" - Baking Soda will not work, nor will Arm & Hammer Detergent - It must be sodium carbonate!!
POWDER #1
1 finely grated bar of Fels Naptha laundry soap
1 cup Borax
1 cup Arm and Hammer Super Washing Soda
-mix REALLY, REALLY well and store in 32oz container.
-use 1-2T per load for any type of washer!
POWDER #2 --for a 5 gallon bucket full
1 4 lb 12 oz box Borax (2.15 kg or 76 oz) found in the detergent aisle
You should be able to find all of these items at your grocery store.
Toss it all together in a 5 gallon bucket and mix it really well.
Put some in a smaller container along with a TBLS scoop to keep out and refill as needed.
-This detergent is safe for HE washers and should be added to the barrel instead of the dispenser.
-This detergent is safe to use on sensitive skin.
http://beingcreativetokeepmysanity.blogspot.com/2010/11/homemade-laundry-soap.html#comments
FABRIC SOFTENER
White Vinegar! Put in your softener dispenser or use a Downy Ball. It leaves NO Vinegar smell on your clothes and doesn't goop up like regular softener does. Also, way better for fire safety on your dryer venting! It doesn't leave a film/residue:)
4 Cups - hot tap water
1 Fels-Naptha soap bar
1 Cup - Arm & Hammer Super Washing Soda*
½ Cup Borax
- Grate bar of soap and add to saucepan with water. Stir continually over medium-low heat until soap dissolves and is melted.
-Fill a 5 gallon bucket half full of hot tap water. Add melted soap, washing soda and Borax. Stir well until all powder is dissolved. Fill bucket to top with more hot water. Stir, cover and let sit overnight to thicken.
-Stir the whole thing with a whisk (breaks it up the best) and fill a container half full with soap and then fill rest of way with water. Shake before each use. (will gel) note--I have used Sterilite brand pitchers but Rubbermaid 2qt Mix and Stir pitchers work the best!!
-Optional: You can add 10-15 drops of essential oil per 2 gallons. Add once soap has cooled. Ideas: lavender, rosemary, tea tree oil.
-Yield: Liquid soap recipe makes 10 gallons.
-Top Load Machine- 5/8 Cup per load (Approx. 180 loads)
-Front Load Machines- ¼ Cup per load (Approx. 640 loads)
*Arm & Hammer "Super Washing Soda" - Baking Soda will not work, nor will Arm & Hammer Detergent - It must be sodium carbonate!!
POWDER #1
1 finely grated bar of Fels Naptha laundry soap
1 cup Borax
1 cup Arm and Hammer Super Washing Soda
-mix REALLY, REALLY well and store in 32oz container.
-use 1-2T per load for any type of washer!
POWDER #2 --for a 5 gallon bucket full
1 4 lb 12 oz box Borax (2.15 kg or 76 oz) found in the detergent aisle
1 4 lb box Arm & Hammer Baking Soda (1.81 kg) found in the cooking aisle
1 box Arm & Hammer Super Washing Soda 55 oz (3 lb 7 oz) found in the detergent aisle
3 bars of Fels-Naptha soap, found in the detergent aisle, finely grated (use your food processor!!)
2 small containers of Oxy Clean or store brand Oxy Clean (try to get about 3.5 lbs total (1.58 kg)) found in the detergent aisle. (this is optional) You should be able to find all of these items at your grocery store.
Toss it all together in a 5 gallon bucket and mix it really well.
Put some in a smaller container along with a TBLS scoop to keep out and refill as needed.
-This detergent is safe for HE washers and should be added to the barrel instead of the dispenser.
-This detergent is safe to use on sensitive skin.
http://beingcreativetokeepmysanity.blogspot.com/2010/11/homemade-laundry-soap.html#comments
FABRIC SOFTENER
White Vinegar! Put in your softener dispenser or use a Downy Ball. It leaves NO Vinegar smell on your clothes and doesn't goop up like regular softener does. Also, way better for fire safety on your dryer venting! It doesn't leave a film/residue:)
RAW MILK
http://www.raw-milk-facts.com/index.html
We drink raw milk as many people who prefer clean and unadulterated foods do. Traditional dairying cultures studied by Weston A Price always consumed their milk in a raw and unadulterated state. Pasteurization, invented in the 19th century, began to applied to milk and cream in the early 20th century. Raw milk is extraordinarily rich in nutrients: natural vitamins that are otherwise destroyed by pasteurization, food enzymes that help you to better digest the milk and beneficial bacteria that support immune system health.It is critical, however, that the raw milk you drink is not ordinary raw milk; rather, make sure you’re choosing a good supplier. Your supplier should keep his or her cows or goats on pasture, fed on grass and fresh hay, with plenty of room to move around. The milk area should be impeccably clean, free from manure, stray hay and other potential sources of contamination. The milk should be immediately chilled and it should be regularly tested for pathogens (with the results of those tests being made available to you).
What if you can’t find raw milk? Choose a low-temperature pasteurized or vat-pasteurized raw milk produced from free-ranging grass-fed cows.
My family drinks raw milk not only because it a source of beautiful nourishment not found in pasteurized milk: naturally occurring vitamins (in pasteurized milk, synthetic vitamins are added back in to make up for the nourishment lost), wholesome fats, food enzymes and beneficial bacteria. We also prefer raw milk because it is an additional way in which my family can support local farmers who offer greater accountability than do large industrial agriculture operations.
We drink raw milk as many people who prefer clean and unadulterated foods do. Traditional dairying cultures studied by Weston A Price always consumed their milk in a raw and unadulterated state. Pasteurization, invented in the 19th century, began to applied to milk and cream in the early 20th century. Raw milk is extraordinarily rich in nutrients: natural vitamins that are otherwise destroyed by pasteurization, food enzymes that help you to better digest the milk and beneficial bacteria that support immune system health.It is critical, however, that the raw milk you drink is not ordinary raw milk; rather, make sure you’re choosing a good supplier. Your supplier should keep his or her cows or goats on pasture, fed on grass and fresh hay, with plenty of room to move around. The milk area should be impeccably clean, free from manure, stray hay and other potential sources of contamination. The milk should be immediately chilled and it should be regularly tested for pathogens (with the results of those tests being made available to you).
What if you can’t find raw milk? Choose a low-temperature pasteurized or vat-pasteurized raw milk produced from free-ranging grass-fed cows.
ready? here’s how to use raw milk
If you’re ready to try raw milk, you can use it much in the same way you might use any milk or cream; however, to maintain the bulk of its benefits, it’s best not to heat or boil raw milk. Instead, simply use the milk raw, slightly warmed or stirred into cooked foods at the very last minute.- Drink it plain or slightly warmed.
- Cultured Dairy: Milk Kefir, Raw Milk Yogurt
resources to investigate further
Want to look into it more? The following books provide greater information about the benefits of raw milk and the push from raw milk to pasteurization.- Nourishing Traditions
- The Untold Story of Milk
- The Raw Milk Revolution
- The Whole Truth about Milk: Raw-vs-Pasteurized
HERE WE GO!!
I truly don't know much about blogging, though looking at some of the ones I've stumbled upon, THEY DO! So this will be simple, but informative. I won't always have awesome pictures or fancy lettering, but that just takes too much time, and since my goal is to simplify life by getting back to the basics, taking extra time just won't work for me. My goal through this blog is to share the things I've learned about making things from scratch, saving money, and being healthy in the process!! I love to spend time finding old school recipes for home cleaning products that are super easy. Also enjoy encouraging people to make things from scratch! I know life is super busy and buying the "box" is so much easier, but let me tell ya...it's not healthier and most of the time, is so much more expensive than making it yourself!! I'm not a scientist or a dietician, and my information is usually borrowed from someone else, but I'll do the work of putting together what I have found to be useful, effective, and if it's food related, yummy! So enjoy what I'm learning and trying, and always feel free to comment what YOU have discovered or recipes you have tweaked!! One size doesn't always fit all...
Subscribe to:
Comments (Atom)